Connecting your computer to a screen, keyboard, mouse, power, and Ethernet is a simple process, but it can be overwhelming if you’re not familiar with the different types of cables and ports. In this article, we’ll break down each step and provide more details on what each type of plug looks like.
Screen

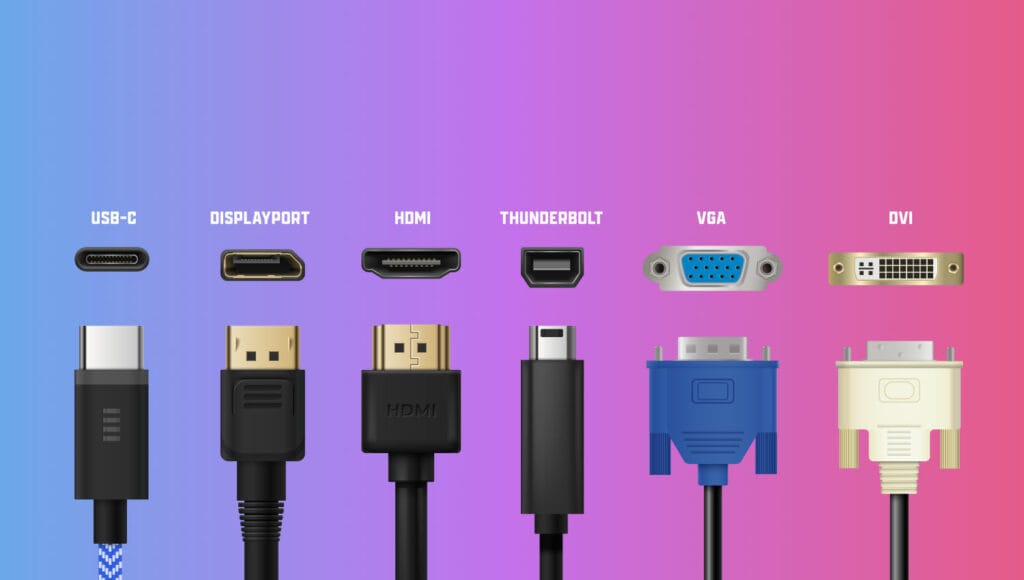
The video output on your computer is typically located at the back of the PC or the side of a laptop. The most common types of video cables are HDMI, VGA, and DVI. HDMI cables are the most popular because they offer high-quality audio and video. VGA cables are the most common legacy video connectors, and DVI cables offer better image quality than VGA.
If your computer has a graphics card, especially for gaming PC’s you will need to pay extra attention to the port layout at the back of the PC, as there may be two places you can connect your monitor, the most important thing to note is with a machine that has a graphics card, that you must connect the Screen to the ports on the Graphics Card its self, and not the ports for the integrated mainboard graphics. We have an article here about connecting your PC with a graphics card.
Keyboard and Mouse

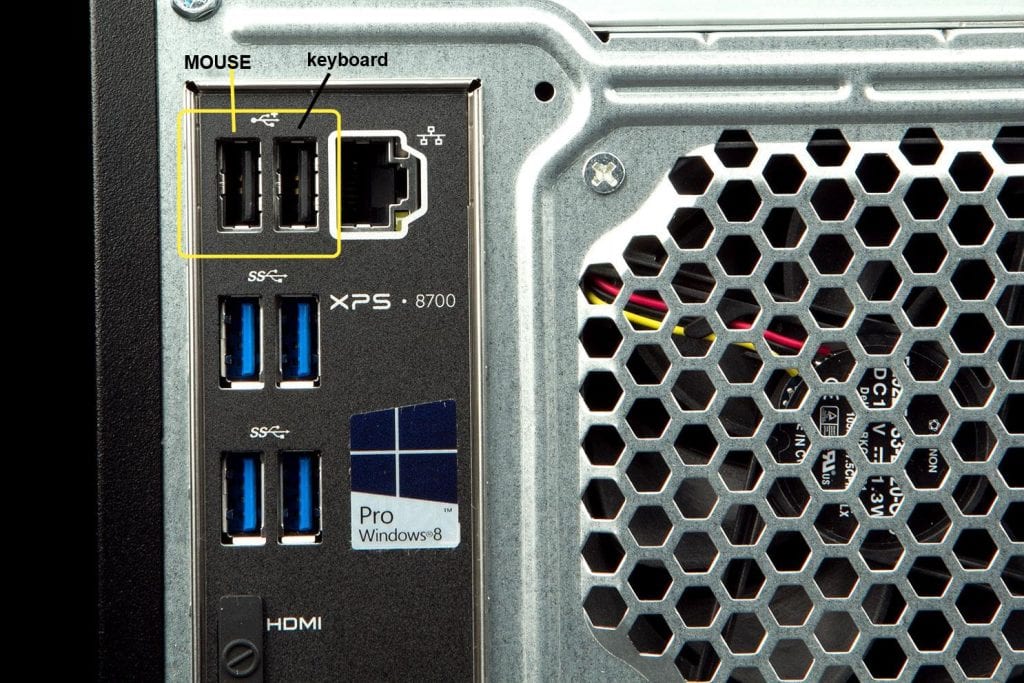
The USB connector on your keyboard and mouse should plug into the available USB ports on your computer. These USB ports are typically rectangular and can be found on the front or back of the CPU. Make sure the USB connectors are securely connected to the computer. You can plug them into any of the free USB ports, there is no requirement for them to be in any specific USB port, as they are universal.
Power

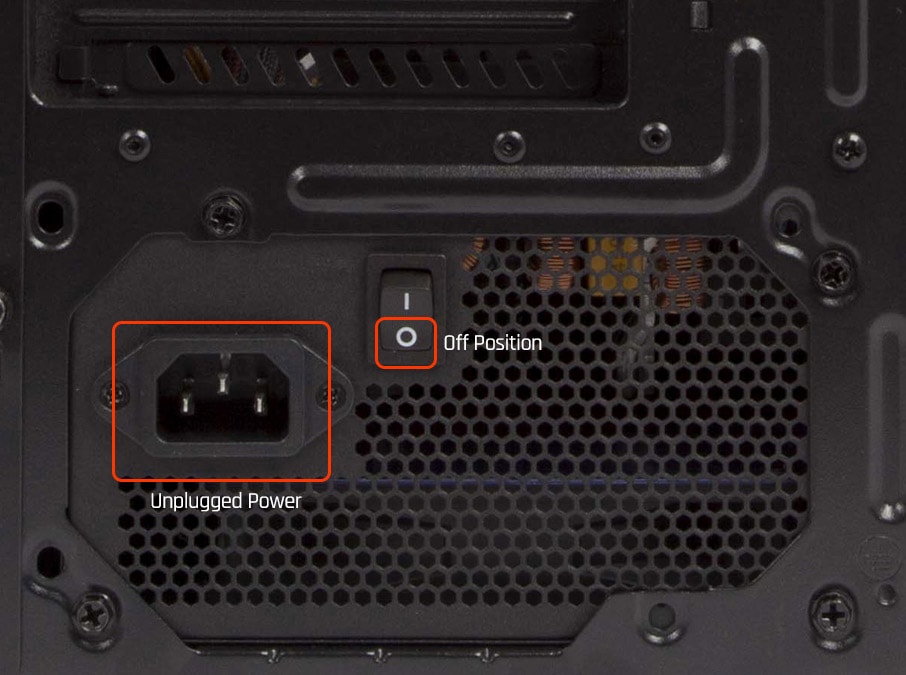
The power cable should be plugged into the back of the unit. The cable should then be plugged into a nearby outlet ideally with a surge protector. Make sure the power cable is securely connected to both the computer and the outlet. Pay special attention to the power switch (if fitted) and ensure it is switched on. If you see a red coloured switch that requires the use of a tool to change, which often has writing indicating 110/240 volts, DO NOT touch this. This is the voltage selection switch and should only be changed by a professional if your computer is physically moved to another country with different power requirements.
Ethernet

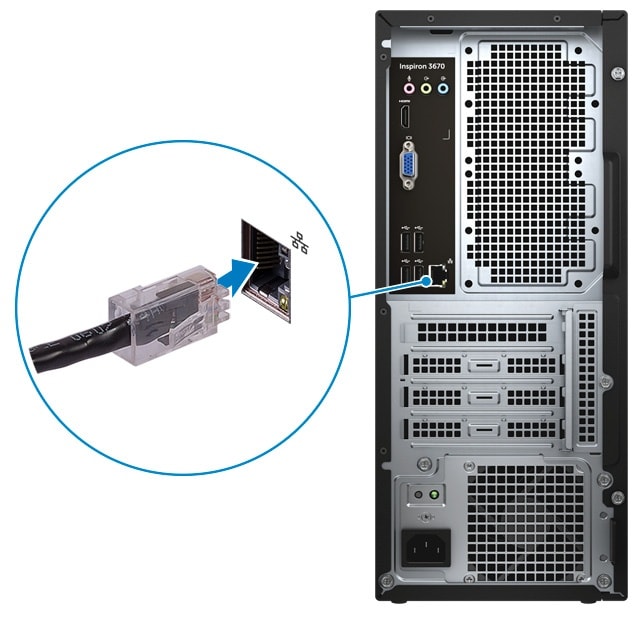
The Ethernet port is typically located at the back of the unit. It’s a rectangular port that looks similar to a phone jack, but slightly wider. Plug one end of the Ethernet cable into the modem or router and the other end into the Ethernet port on the computer.
If you’re using a WiFi connection, you will not require an ethernet cord. Simply click on the network icon in the taskbar and select the Wi-Fi network you want to connect to. You can find out how to do this with our Step by Step WiFi connections article.
Time to start your PC
Once you’ve connected your computer to the screen, keyboard, mouse, power, and Ethernet, simply press the power button on the front of your machine. You should soon see your computer’s desktop on your screen. If you encounter any issues during the setup process, check your connections, and make sure everything is plugged in correctly.
Setting up your computer is a simple process that can be done by following these easy steps. By connecting your computer to a screen, keyboard, mouse, power, and Ethernet, you’ll be able to access all of its features and capabilities. If you’re still having trouble setting up your computer, don’t hesitate to contact a professional or consult the manufacturer’s website for support. With these tips, you’ll be up and running in no time!
