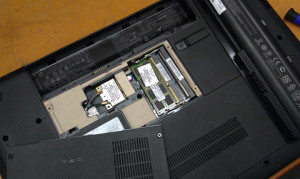
Upgrading your RAM can be one of the simplest things you can do to improve your system performance. In this article we will show you exactly how the Pro’s do it, so you can enjoy your upgraded RAM in confidence that it will work flawlessly.
The first thing you need to do is check to see what type of RAM your laptop is capable of. I have found the best way of doing this is to visit the Kingston website and use their Memory Search tool ( located here ). After you locate your laptop via their manufacturer/model search you can see exactly which type of memory your laptop requires, and how much it is able to handle.
Once you’ve purchased your RAM all you need are the following tools…
- Precision screwdriver set (mainly Phillips head is required, some laptops use Torx, be sure to check).
- Antistatic Wrist Strap.
- A copy of Memtest 86+ burnt to CD (freely available at http://www.memtest.org/ ).
- Clean tidy bench and some spare time.
Locate exactly where your laptop’s RAM is installed. The easiest way to do this, is to flip your laptop over and look for a compartment with a memory symbol on it. It’s usually a smaller compartment than the rest, due to the laptop also usually having a compartment for the Hard Drive which is physically larger.
On this particular laptop (Compaq Presario CQ62) you also need to remove the Battery before being able to remove the cover for the RAM compartment.
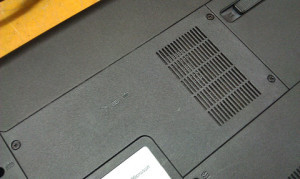
Beware, some laptops have their memory under the keyboard, which will require you to remove a few screws from the back of the laptop, then gently lift the keyboard from the unit.
After you have removed the screws from the compartment, you will have gained access to the RAM module/s. If you are only installing one more RAM module and you already have a spare slot, just pop the new one in with the next step. If replacing an existing module, remove the memory by undoing the clamps on either side of the memory and gently lift the module to a 45-degree angle while pulling it out of the slot.
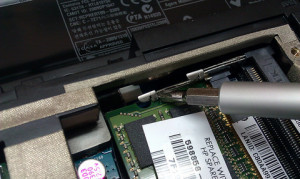
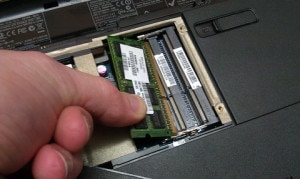
Take your new stick of RAM and simply align the small notch of the RAM module, with that of the memory slot. Gently insert the module at a 45-degree angle. Then, using medium pressure push the memory down towards the mainboard, until the clamps on either side of the module lock into place.
After you have replaced the compartment cover on your laptop and tightened the screws we need to test the memory to ensure it is working properly. A lot of people are not aware of this step and just turn their computer on and use it, later wondering why it’s all of a sudden crashing or having strange stability issues.
Due to how your system uses memory, every single thing you do on your computer has to be written to memory first, so if there is even one tiny error in the module, you can have a world of issues with your computer.
To do this simply take your copy of Memtest86+ that you downloaded and burnt earlier, and set your machine’s BIOS to boot from the CD. You will be presented with a blue memory test screen like the one shown below.
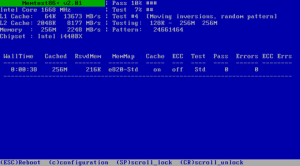
Once it has done at least 3-5 successful passes you can be sure your memory is in tip-top condition. Alternativley if you see a RED error then you need to either…
- Ensure you installed the memory module/s correctly.
- Ensure you have the right type of memory for your machine.
- Remove the old memory from your machine (as it may not be compatible with the new upgraded module you have installed).
We hope you have enjoyed this guide, check back for more helpful geek tips from hungryPC and don’t forget to subscribe.

